Chapter 5
Real IR - The digital Post-Example
Let's see what it takes
to polish a black and white IR-photography for presentation.
Some words to the equipment
i use:
For processing my images i use both an XP-PC and a Mac.
The displays are carefully calibrated around a white target of 6500 Kelvin with
a Gretag Macbeth Eye One.
Scans from slides or negatives come in via a trusted Nikon LS-4000ED.
The use of a tablet is second nature to me, for work on photos an A5 sized Wacom
Intuous II is a good choice.
Software:
Adobe Photoshop cs, since the raw-converter in there has made it's big jump
to challenge every other one the only processing-software i need,
NeatImage Pro as plugin for cs, very handy for work on these bad digital camera
images,
an old ACDSee for browsing through presentation-jpegs,
that's all i need. ;-)
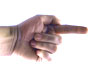
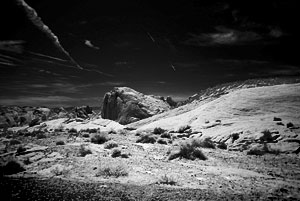
The picture on top was taken
in the Valley Of Fire National park in Nevada around midday with well beyond
100F ;-) Camera was my modified Sony S85. Because of the conditions there and
the extreme sensitivity of the Sony the use of the RG1000 filter was mandatory,
RG830 was close to being unusable there. Because i wanted to have a very hard
monochrome image anyway, good for me. exif-data says: 1/80sec., f2.2, ISO100.
To make a bad lens worse i put a Sony 0.75x Wideangleconverter atop of it. ;-)
Let's have a look at the histogram:
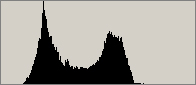
tonal distribution is acceptable although 1/60sec. might have been the better
choice here. Bracketing would have been really useful under these tough conditions,
judging a camera display in the midday-desert sun is close to impossible.
These jpegs only carry 8-bit data of tonal differences so first thing out of
habit is to change into a color space with more headroom. As with monochrome
images there should be no advantage in using LAB-mode over 16-bit RGB but i
switch to LAB anyway because i've grown so accustomed to working with it. To
hold the working steps reproducible and most of all changeable i choose the
nondestructive way of adjustment layers. My first one usually is levels.
The blacks allow for some
crushing here because only the sky is involved and i like a good black sky.
When correcting for highlights i am very careful because clipping information
there is at least in this picture not a good thing. On balancing the levels
out i moved the slider back to a higher weight for the blacks as i want to have
a hard picture.
My second adjustment layer usually is the curves. Here i can fine tune what
i approximated in the levels. Curves are nondestructive, means no clipping will
occur here so that's where i will give the picture the final jolt.
If your picture was exposed
balanced usually a smooth S-curve will do the trick to get a brighter, more
contrasty picture. Notice that again the blacks are stronger pulled that the
highlights.
Basically that would be it, but i thought this to be not enough to show so i
inserted another step for some showing off. If you have developed your own monochrome
films you are aware that there are different techniques to say see to it that
a certain part of the image gets to get more light or gets dry earlier and so
on. These techniques can of course all be simulated in our digital environment
- i do nothing spectacular but lay a black plane over my picture, use overlay
as transfer mode and paint a quick mask.
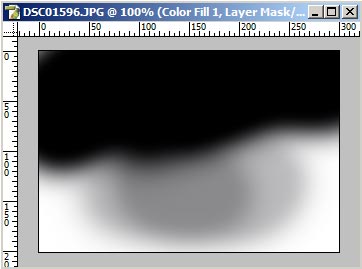
This is just to give more strength to leading the view onto the big rock, the important parts in the picture stay brighter than the brightest parts of the mask.
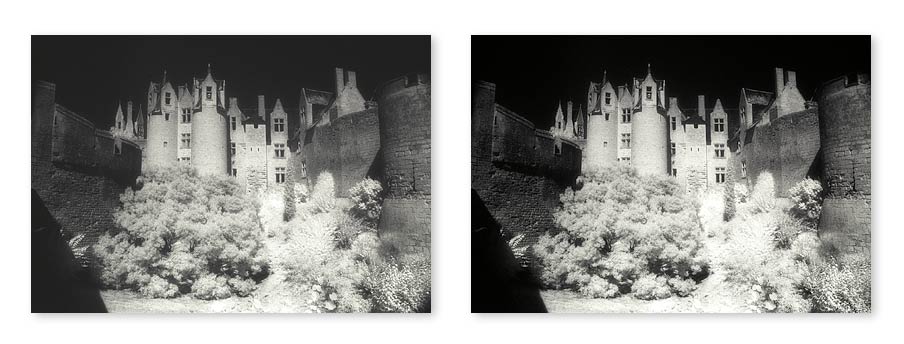
The result is a very clear view into a beautiful different world. Our world ,-)
Further steps like denoising,
scaling and sharpening for web presentation would follow now we have a master
- every kind of output media can be served from this point on. First station
would be my printer now ;-)
Summary:
Working on "real"
IR-imagery is a really easy task once the technical obstacles are taken. Too
big a angst of IR, be it digital or analog is completely unnecessary and does
nothing more than build distance to forbear from doing it.
With IR on Kodak HIE i have become quite lazy - i found out that the local developer
can do the developing work on a very satisfying level for me -
 this
way the effort needed to finish a picture after scanning is maybe a mere 5 minutes
or so.
this
way the effort needed to finish a picture after scanning is maybe a mere 5 minutes
or so.
So don't be shy - real IR-photography is nothing more than normal black&white
work when all is said and done and post processing is a wheeze -
especially compared to Color Infrared photography which i will cover on the
next pages.