Chapter 7
Learning by doing - Processing example Color-IR
The goal here is to finish
a nice picture for web presentation. Time to button up, the chef is standing
at the ready to tell us the ingredients needed:
Adobe Photoshop cs
NeatImage Pro v4.4
Tablet (easier with it)
A source picture
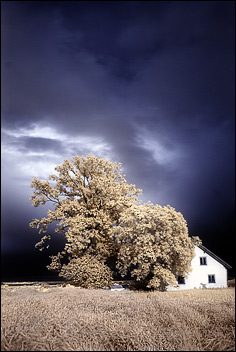
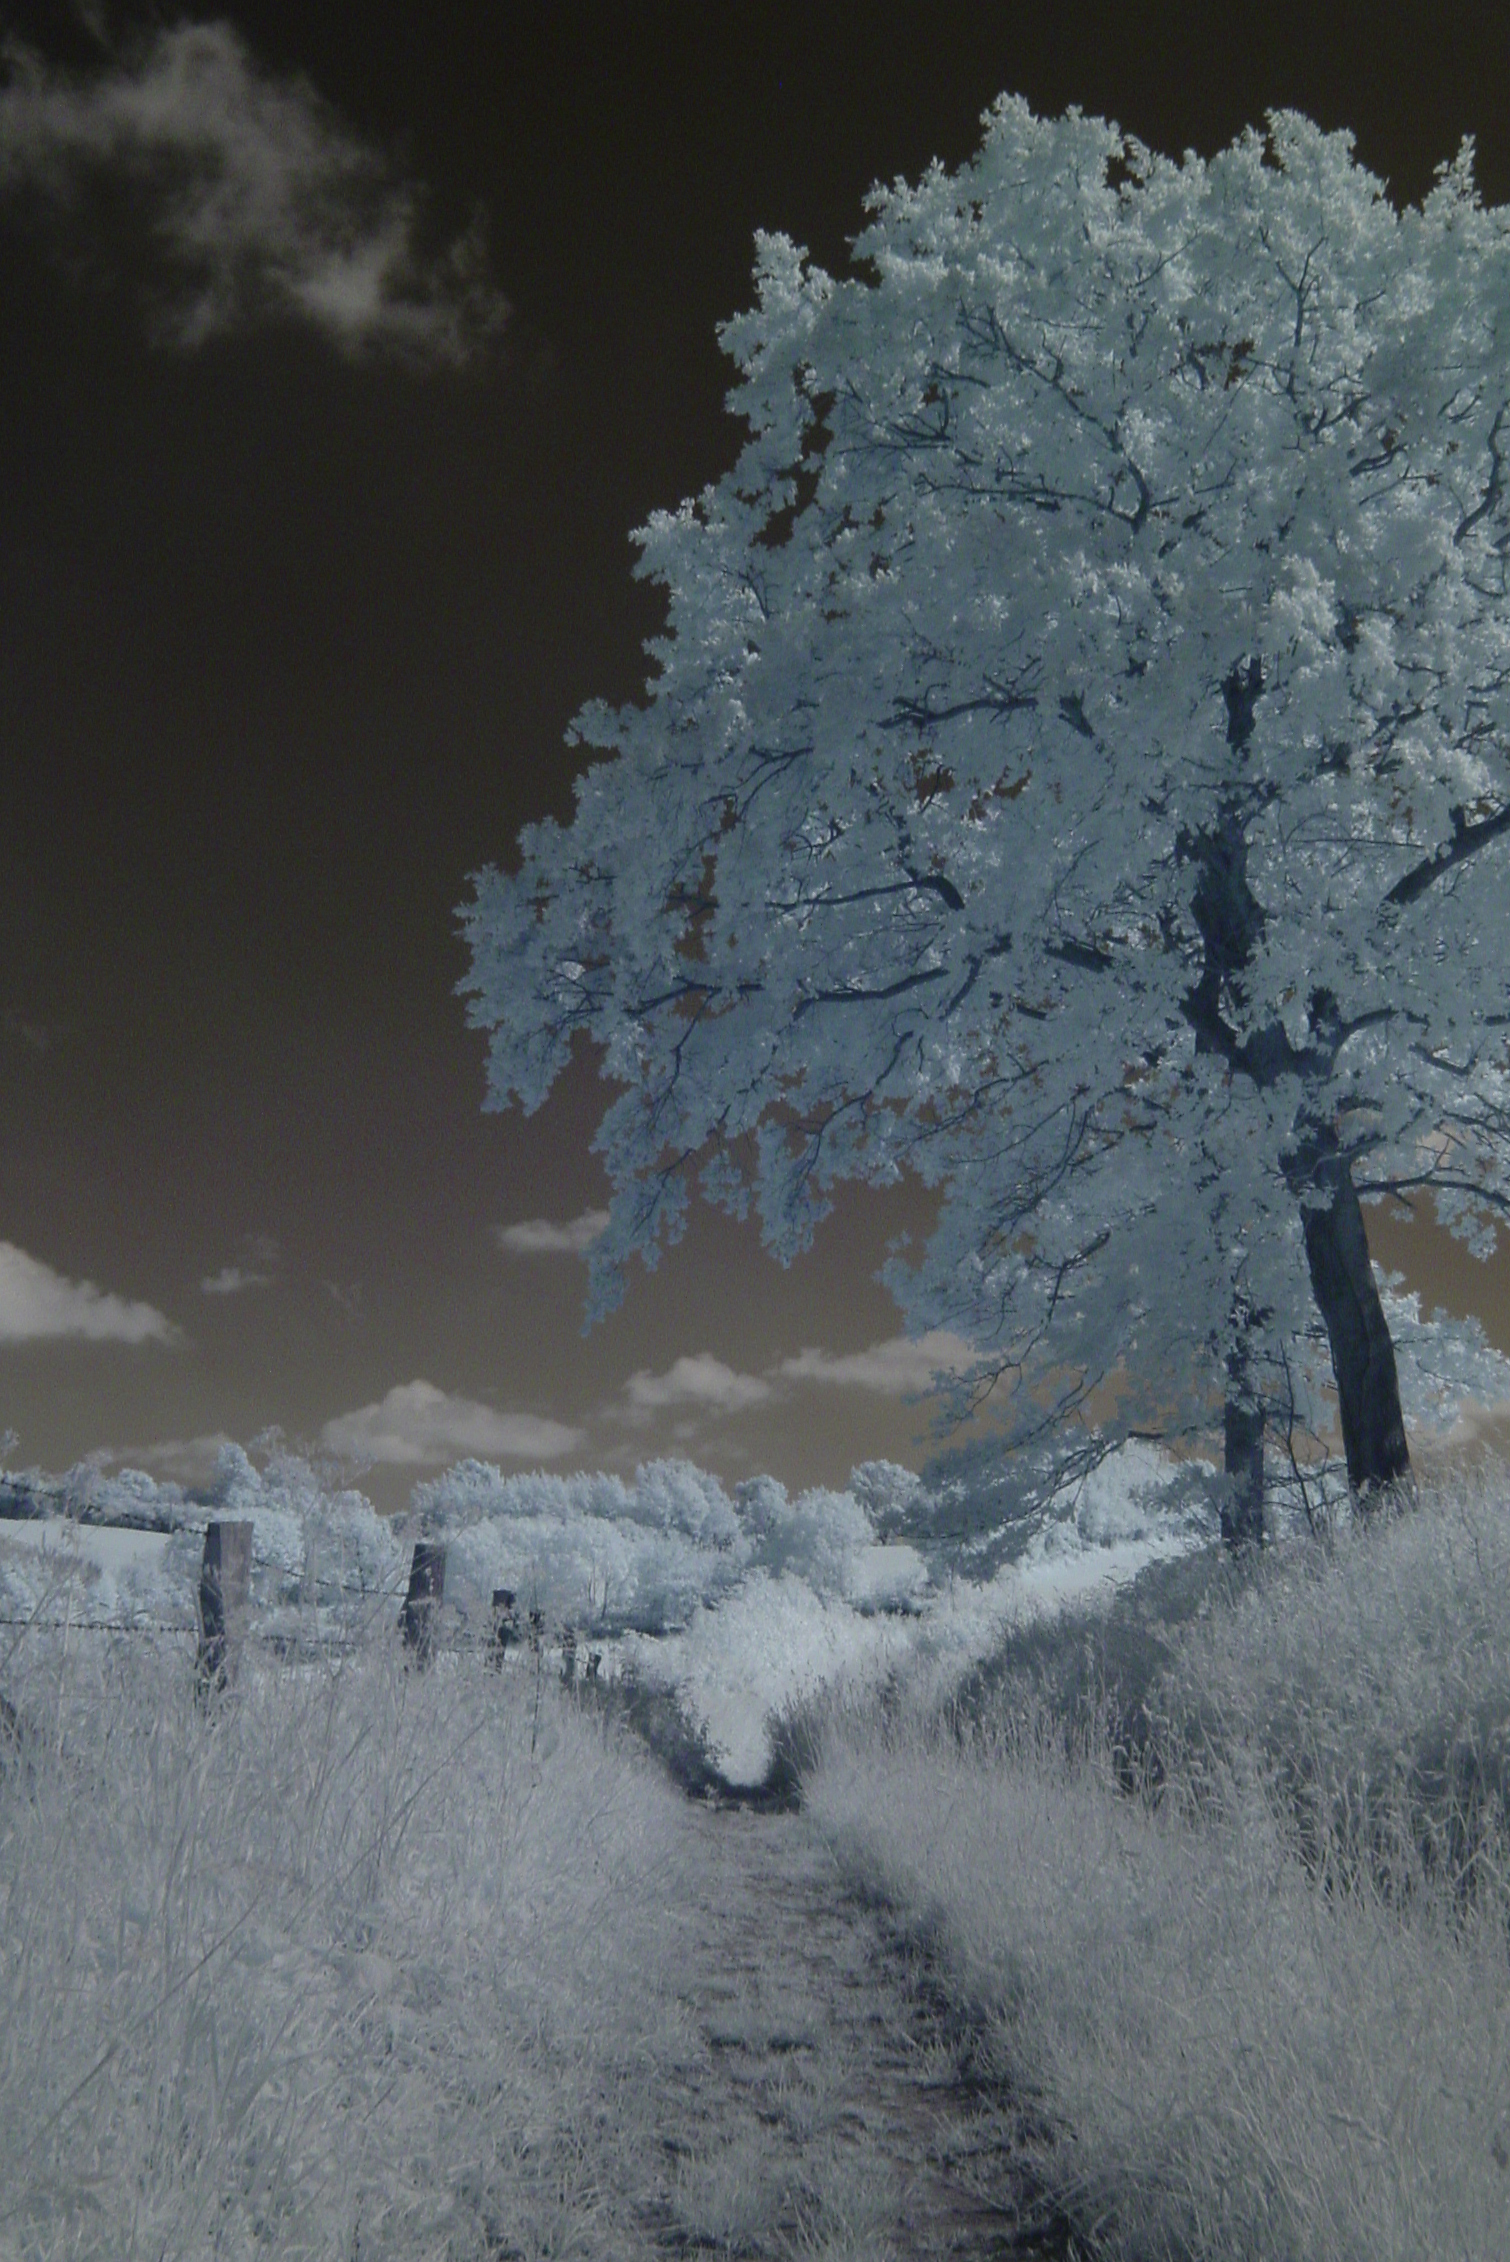
The first two ingredients i am sorry to say you have to buy yourself, the picture is courtesy of moi:
 If you like you can download the original here
. 1.8Mb.
If you like you can download the original here
. 1.8Mb.
You will mos probably be
shocked about he quality of the picture - yes, i am too, but i had to live with
it for quite a while, so do we now too ;-)
You may have a quick check with AutoLevels what the picture offers with fully
scaled channels - in our processing now we of course do the correction manually.
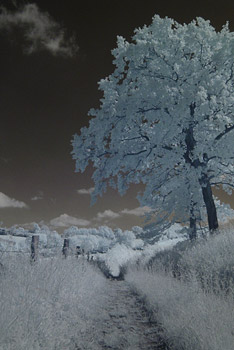
The first step probably answers your question for how the sky was made blue
in those IRs you know - please enter the Channel Mixer.
As you have seen in the previous pictures the sky is always being recorded in
some shade of red, depending very much on your white balance setting. On the
other hand, foliage and other highly reflective objects are recorded in a bluish/cyan
shade - so what we want to do here is to swap the contents of the red channel
with that of the blue channel - everything red is now a shade of blue according
to the amount of data in the channel and vice versa.
Now you may start to understand the nature of my white balance lecturing - the
better a white balance results in an image that is good to swap channels, the
less work we have with the picture afterwards.
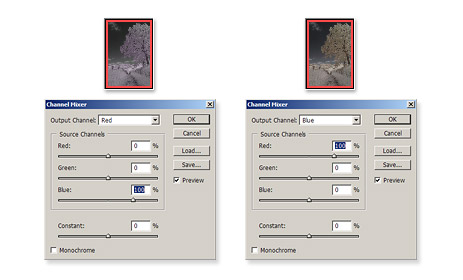
Because i do that swapping quite often i have recorded this Channel Mixer step
into an action and put it on F11. But there is one time where you have to run
through this process manually, so please set the values like this: Red Channel
- Red 0, Blue 100. Blue Channel - Red 100, Blue 0. Done ;-)
That wasn't too hard, was it? The resulting image should look like this:

A very devious specialty
of this little Sony is that it puts very nice red and green aberrations into
the images. I guess it's something to do with the coating of the "glass"
- no matter what, this has to go first.
So at first again as in the monochrome example we change the working color space
to LAB mode. A lab image consists of the Lightness and a and b channels, the
latter carrying the color information. As i found out after months and months
ripping out my hair the easiest way is:
Click on the a-channel to see some gray mud with the hint of our picture in
it. Then go to Edit -> Fill (Shift + F5) and fill the channel with black.
You won't see much of black, if all went well all you have now is a completely
level gray a-channel. If you click on Lab now in the channel view the resulting
image should look like this:
Now, this is a good basis
for further engineering. Please change the color space back to RGB, but be sure
to click 16-bit instead of 8bit.
We have to work on the noise now - if you don't have NeatImage you may use your
own method of denoising or just skip this part.
In tough cases like this i tend to work on the single channels rather than globally
on the full image. First of all, hit CTRL-J (resp. Apple-J) to copy your image
into a new layer. Here in layer 1 we now "neat" the channels.
The red channel (formerly the blue one) is quite noisy especially in the sky.
Check that your color space in NeatImage is set to YCrCb JPEG and let Auto profile
work it's magic. In the Noise Filter Settings noise reduction in Y is fine with
50%. Very low freq, Smooth edges, High quality and High resolution are all activated.
Let him go render.
The green channel is fine for me, so the next one will be the blue one. CTRL-F
(Apple-F) to invoke the same settings on the blue channel and now check the
result - i don't like what's going on right next to the leftmost branch so i
choose the red channel again and enter the NeatImage plug. The region i didn't
like gets a selection in which the Auto profiler can work. Let it render and
the first noise reduction is done.
Good thing that the noise levels are very acceptable now, too bad only that
all our detail in the foliage has gone, too. This is modern denoising for you,
you can't have it all on automatic. But that's why we used our foresight and
made a copy of our original image. All we have to do now is erase all the part
that we don't like - and that's where a tablet comes to very efficient use.
This is done in one or two minutes with a pen, mouse use takes a little more
time.
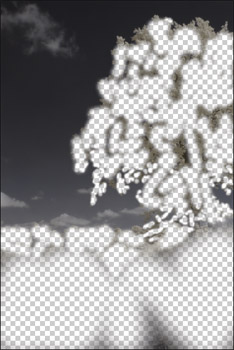
This is my quickly painted
denoised layer now - i'd rather have more details that may be a little noisy
than a completely muddy image. Now is a good time to save the psd, after that
we flatten the layers to have one single image again.
Now for the color correction. CTRL-Y (Apple-Y) to activate your Soft-Proof profile
for display output of course as the first step. If you should not work calibrated
(tststs) activate the Soft-Proof nevertheless - at least choose Windows RGB
as profile, better than nothing at all ;-)
Adjustment layers, as in the monochrome chapter, make life easier, so we start
again with a new adjustment layer -> Levels.
My values for the image: 29, 1.11, 180.
Next adjustment layer -> Hue/Saturation. Just pull up the global saturation
by 25, that's ok.
Next adjustment layer -> Curves. Make three points, point 1: in17 and out3.
point 2: in83 and out77. point 3: in228 and out237.
This is what it looks like now:
I really like the picture
now, my only misgiving is the cloud in the left upper corner ... i don't know,
i guess we need to see how it looks like without it. That's the thing with creative
work, you have to run through different setups to find your "feel good"
version - if we wanted the cloud to be back up there in a better fashion we'd
have to work with selections to get it alone into a new layer and then - but
stop, we go on with the plan to remove it anyway first.
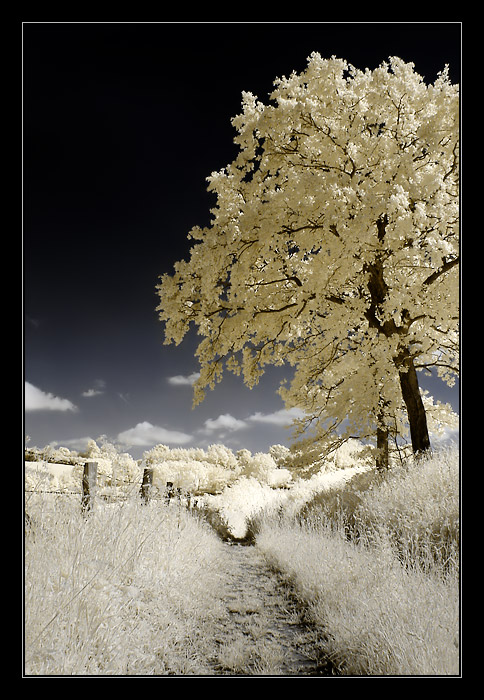
This is our first master image, so we save this here before we go on with scaling
and sharpening. The final size for web presentation will be 434x650px.
My first downscaling is usually exactly half the size - makes it easier for
the oldish bicubic algorithm in ps. So 1131px vertical is the size we want.
Now for the first sharpening - Filter -> Sharpen -> Unsharp Mask. Values:
118, 0.9, 1.
Next scaling, this time to the final size of 650px vertical. Another USM, values:
47, 0.5, 1.
Final judgment of the image let's my twitch my brows still here and there. The
color of the foliage, especially in the tree is too greenish for me. What a
luck we use adjustment layers, so we enter the Hue/Saturation layer and move
the hue slider of the Yellows to -5.
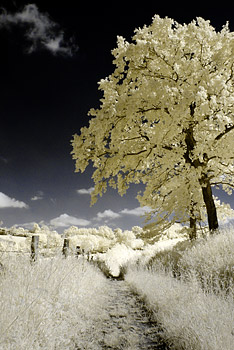
Now, that looks better. The sky ... the sky ... i don't know, this is not really
it.But hey, that's a live tutorial for you, just like in real life ;-) I'll
leave it at that, only some noise has come up again by us trimming the contrast
of the sky - let's enter the NeatImage plug one last time with the full image,
select the noisy region in the sky again and let it do it's thing. No vital
parts of the scene have been softened this time, so here we have it:
Of course - you can do much
much with it if you take the time - i have done it really quick while writing
along.
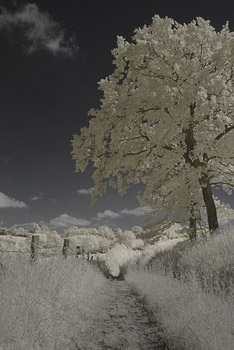
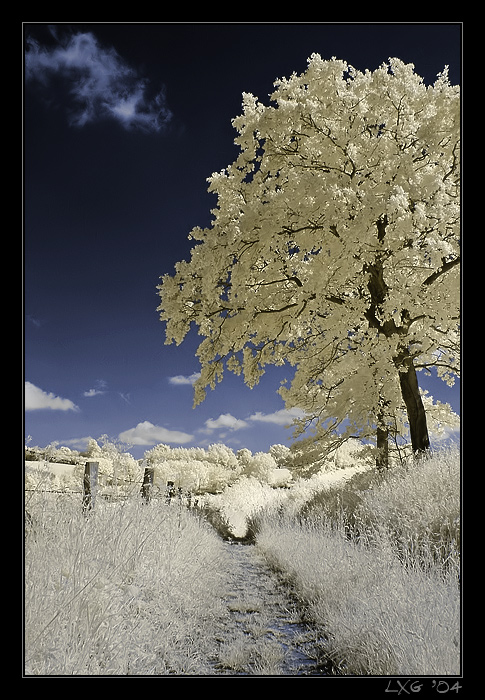
Here is another one i have found in the directory, some old version - there
are many ways to get to one's goal ;-)
Here's a call for some serious
feedback: I'd like you to work this image again completely without the values
of this tutorial - and send me the final result to lx@imagone.de.
I will start an extra page where all of the submissions are shown. Deal?
The next chapter will show how to remove a IR-cut filter.


